


Quick Info — Space & Time Cube 2026
| SM North EDSA location | 5th Floor, The Block, SM North EDSA, Quezon City |
|---|---|
| MOA location | 3rd Floor, SM Mall of Asia, Pasay City (near the bayside area) |
| Ticket price (SM North) | Approx. PHP 880 adult / PHP 680 child (ages 3–12); Klook discounts available |
| Ticket price (MOA) | Approx. PHP 880 adult / PHP 680 child; check Klook/online for promos |
| Time needed | 45 minutes to 1.5 hours per branch |
| Best time to visit | Weekday morning (10–11 AM) for empty rooms and good lighting |
| Discounts | Klook, Shopee, birthday promos — typically PHP 130–180 off walk-in price |
| Parking (SM North) | SM North EDSA car park (The Block zone); weekday mornings are easy |
| Parking (MOA) | MOA car park (North/South); weekends are busy — arrive early |
| Nearby food (SM North) | The Block food concourse; SM North Cinema area; Trinoma nearby |
| Nearby food (MOA) | MOA food court; Mall of Asia bayside restaurants; S Maison dining |
I’ll be honest—I was skeptical when I first heard about Space & Time Cube at SM North EDSA. Another Instagram museum in Manila? But after visiting on a quiet weekday morning in January 2026, I walked out genuinely impressed.
If you’re searching for the Space & Time Cube SM North EDSA ticket price in 2026, legit discounts, the best time to visit, and whether it’s actually worth your money, this guide covers everything you need—based on a real weekday visit, not hype.
Here’s the thing: if you’re hunting for things to do in Quezon City that don’t involve fighting EDSA traffic to the south, this place delivers. Located right on the 5th floor of The Block, it’s stupidly convenient—park, ride the escalator, and boom, you’re in a galaxy of LED lights and infinity mirrors.
The ₱880 ticket price (₱680 for kids) stings a bit at first. I won’t lie about that. But here’s where it gets interesting: I visited on a weekday at 10:30 AM with a Klook discount code and had entire rooms to myself for 15-20 minutes. No elbowing through crowds, no waiting for that perfect shot. Just me, my phone, and some genuinely trippy installations that made me feel like I’d stepped into a sci-fi movie.
Space & Time Cube isn’t trying to be teamLab—and that’s fine. It’s smaller, simpler, and way more accessible for most Metro Manila folks. Think of it as immersive art for the masses, done well enough that you’ll actually want to spend an hour exploring.
In this guide, I’ll break down everything you need to know: exact ticket prices (including every discount trick I found), how to actually get there without confusion, the best time to visit, and which installations are worth your phone battery. I’ve also compared the SM North branch directly to the original S’Maison location because, yes, there are real differences.
Whether you’re planning a date, need content for your Instagram feed, or just want an air-conditioned escape from Manila’s heat, let’s figure out if Space & Time Cube deserves your time and money.
Quick Answer: What Is Space & Time Cube SM North EDSA?
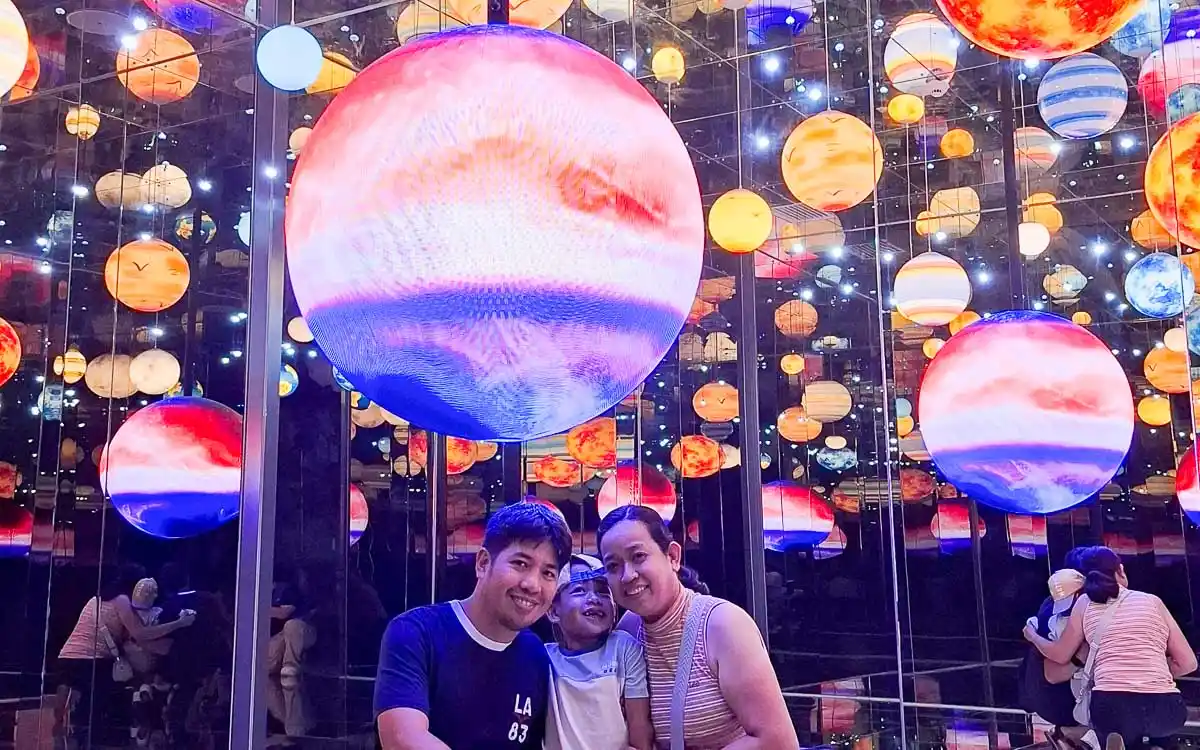
Space & Time Cube SM North EDSA is an interactive digital art museum in Quezon City featuring 18+ immersive installations that use LED lights, infinity mirrors, projections, and motion-reactive technology.
Key details (2026):
- Location: 5th Floor, The Block, SM North EDSA
- Ticket price (2026): ₱880 adults / ₱680 kids
- Time needed: 45 minutes to 1.5 hours
- Discounts: Available via Klook and birthday promos
It’s designed for photography, casual exploration, and visual immersion rather than education—think of it as an Instagram-ready art playground done well.
Table of Contents
Why Visit Space & Time Cube at SM North EDSA?
Five Reasons to Go
1. Convenient North Location
If you live anywhere north of Makati, getting to the original S’Maison branch in Pasay feels like a pilgrimage. SM North EDSA is accessible via MRT-3, multiple bus routes, and doesn’t require navigating the chaos around MOA. I got there from Fairview in 25 minutes on a Thursday morning.
2. Exclusive Attractions Not at Original Branch
The SM North location features several installations you won’t find at S’Maison, including Breathing Lights (motion-reactive LED panels), Dancing Particles, and Love Scenario (a couples-focused booth). If you’ve already visited the Pasay branch, there’s still fresh content here.
3. Perfect for Content Creators and Couples
Every installation is designed with photography in mind. The lighting is flattering, the backgrounds are dynamic, and the reflective surfaces create natural visual interest. I watched three separate couples doing impromptu photo shoots, and honestly, their content looked professional even on phones.
4. All-Weather, Air-Conditioned Activity
Manila’s weather is unpredictable. Space & Time Cube gives you a solid hour or two of entertainment regardless of whether it’s scorching or pouring outside. The consistent 22°C temperature inside means you won’t be sweating through your clothes while trying to look good for photos.
5. Easy Mall Integration
Unlike standalone attractions that require dedicated trips, Space & Time Cube slots perfectly into a broader SM North visit. Shop, grab lunch at the food hall, explore the museum, catch a movie—it’s all in one complex. This convenience factor shouldn’t be underestimated, especially if you’re coordinating with friends or family with different interests.
Who Is This For?

Space & Time Cube works best for:
- Content creators and influencers seeking fresh backdrops and viral-worthy shots
- Couples looking for unique date ideas beyond the usual dinner-and-movie routine
- Families with older kids (8 years and up who can appreciate the experience and follow instructions)
- Photography enthusiasts who enjoy playing with light, reflection, and composition
- Tourists wanting Instagram moments without venturing too far from central Metro Manila
- Groups of friends who enjoy interactive, shareable experiences
It’s less ideal for very young children (under 5), people seeking educational content, or those who’ve already visited multiple high-end immersive museums abroad and expect teamLab-level scale.
Space & Time Cube SM North EDSA Ticket Price 2026 (Updated Rates & Discounts)
Current Admission Rates
As of January 2026, here’s what you’ll pay:
Walk-in Rates:
- Adults (13+ years): ₱880
- Children (4-12 years): ₱680
- Senior Citizens/PWD: ₱680 (with valid ID)
- Infants (0-3 years): Free
Online Booking (Klook):
- Adults: ₱748 (15% off with promo codes)
- Children: ₱578 (15% off)
Birthday celebrants have TWO options for free entry (valid for walk-in only, started September 2025):
- On your exact birthday: Free entry when you bring 1 paying companion
- During your birth month: Free entry when you bring 3 paying companions
Show valid ID (government ID, birth certificate, or school ID) as proof. This perk applies to any age—I saw families taking advantage of this during my visit. Note: Not combinable with other promos or discounts.
Discount Strategies That Actually Work
1. Book via Klook Philippines (My Recommendation)
Book Space & Time Cube tickets on Klook to lock in 15% savings and skip the ticketing line. During my visit, I watched walk-in visitors queue for 10+ minutes while Klook ticket holders walked straight in. The price difference on two adult tickets saved me enough for lunch.
2. BDO Credit Card Discount
BDO cardholders can get 15% off walk-in rates by presenting their card at the venue ticket counter. This stacks poorly with Klook (which is already discounted), but if you prefer paying at the venue, it’s your best option.
3. Group Bookings
Groups of 5+ can inquire about package deals directly with the venue. I overheard staff mentioning a “4+1 free” promotion for groups, though you’ll need to call ahead to confirm current offers: check the official Space & Time Cube Facebook page for the latest contact details.
4. Online Booking Saves Money
Weekend walk-in prices are consistently higher than online rates. Online booking through Klook not only guarantees your slot and skips the ticketing line, but also provides substantial savings—typically ₱100-130 off walk-in rates through promotional codes.
Is It Worth ₱880? (Honest Value Analysis)
Let’s do the math. At ₱880 for an hour-long visit, you’re paying roughly ₱15 per minute. Compare that to:
- Movie ticket (₱300-450 for 2 hours): ₱2.50-3.75/minute
- Escape room (₱500-800 for 1 hour): ₱8-13/minute
- Bonifacio High Street museum (₱750 for 2 hours): ₱6/minute
Space & Time Cube sits on the pricier end per minute, but the experience is more interactive than passive entertainment like movies.
It’s worth the money if:
- You’re visiting during off-peak hours (fewer crowds = better value)
- You genuinely enjoy photography and will spend time crafting content
- You’re splitting the cost as a group activity
- You use discount codes (bringing the price to ₱748)
- You haven’t visited similar immersive museums before
Skip it if:
- You’re budget-traveling and prioritizing food/transport over attractions
- You’ve recently visited teamLab or similar high-end installations abroad
- You’re bringing toddlers who won’t appreciate or remember it
- You’re expecting museum-level educational content rather than Instagram experiences
My verdict? At the discounted ₱748 rate on a quiet weekday morning, absolutely worth it. At ₱880 on a packed Saturday afternoon, you might leave feeling underwhelmed.
How to Get to Space & Time Cube SM North EDSA (MRT, Car & Commute Guide)
By MRT/LRT (Public Transport)
From North Avenue Station (MRT-3) – Easiest Route
- Exit the MRT-3 at North Avenue station (the terminal station if you’re coming from the south)
- Follow signs toward “SM North EDSA/The Block” – there’s a dedicated bridge/walkway
- You’ll enter SM North through the Sky Garden level
- Look for directional signs to “The Block” building
- Take the escalator or elevator to the 5th floor
- Turn right after exiting; Space & Time Cube is clearly marked with LED signage
Total walking time from MRT: 8-12 minutes depending on your pace
Alternative: Quezon Avenue Station (MRT-3)
If you’re coming from the north and want to avoid crowds, alight at Quezon Avenue station instead. It’s a slightly longer walk (15 minutes) but often less congested. Exit toward EDSA, walk north along the avenue, and enter SM North through the main entrance.
The official MRT-3 route map shows exact station locations, though signage inside SM North is clear enough that you won’t get lost.
By Car (Driving & Parking)
From EDSA Northbound:
- Take the SM North EDSA exit (well-marked)
- Enter the mall complex
- Follow signs to “The Block Parking”
- Park on floors 4-6 for easiest access (5th floor museum entrance)
From EDSA Southbound:
- U-turn at North Avenue/Mindanao Avenue intersection
- Follow directions as above
Parking Rates (as of January 2026):
- First 3 hours: ₱50/hour
- Succeeding hours: ₱30/hour
- Overnight: ₱200 flat
During my visit, parking was plentiful on weekday mornings (10 AM) with spaces on the 5th floor within 50 meters of the museum entrance. Weekends are reportedly tighter—arrive before 11 AM or after 3 PM.
Grab/Taxi Drop-off:
Tell your driver “The Block entrance, SM North EDSA.” There’s a dedicated drop-off area near the main Block entrance. From there, it’s a 2-minute escalator ride to the 5th floor.
By Bus or Jeepney
Multiple bus routes along EDSA stop at SM North EDSA:
- Buses with “Fairview-Ayala” routes
- Buses marked “Monumento-Makati”
- Any jeepney marked “SM North”
Alight at the SM North EDSA stop (you’ll see the massive mall complex). Enter through the main entrance and follow signs to The Block. Budget ₱15-35 for jeepney fare from most Quezon City starting points.
Best Time to Visit Space & Time Cube SM North EDSA (Avoid Crowds)
Peak vs. Off-Peak Hours
Based on my January 2026 visit and conversations with staff:
Best Times (Minimal Crowds):
- Weekday mornings: 10:00 AM – 12:00 PM ⭐ Best overall
- Weekday late afternoons: 4:00 PM – 6:00 PM (after school/work but before dinner rush)
- Sunday evenings: 7:00 PM – 9:00 PM (most families have left)
Worst Times (Expect Crowds):
- Saturday/Sunday: 2:00 PM – 6:00 PM (peak family/group time)
- Weekday evenings: 6:30 PM – 8:00 PM (after-work crowd)
- Any holiday or long weekend
I visited on a Thursday at 10:30 AM and had 5-6 installations completely to myself for extended periods. Staff mentioned that weekend afternoons can see 200+ visitors simultaneously, which kills the photo quality and creates bottlenecks at popular installations like Wandering Planet.
Seasonal Considerations
School Breaks to Avoid:
- March-April (summer break): Expect crowds daily, especially 11 AM-5 PM
- October (semester break): Moderate increase in family visits
- December 20-January 5 (Christmas/New Year): Peak season, book advance tickets
Rainy Season Advantages (June-September): Manila’s rainy season paradoxically works in your favor. When it’s pouring outside, mall attractions see lighter foot traffic as people stay home. If you don’t mind navigating wet streets to get there, rainy mornings offer excellent crowd-free experiences.
Pro tip: Check the Space & Time Cube Facebook page the day before your visit. Staff sometimes post updates about unusually high traffic or special promotions that might affect crowds.
What to Expect Inside Space & Time Cube SM North (Installations & Photo Tips)
The Complete Attraction List
Space & Time Cube SM North features 18+ installations divided between fan favorites from the original S’Maison branch and exclusive new additions.
Classic Installations (Also at S’Maison):
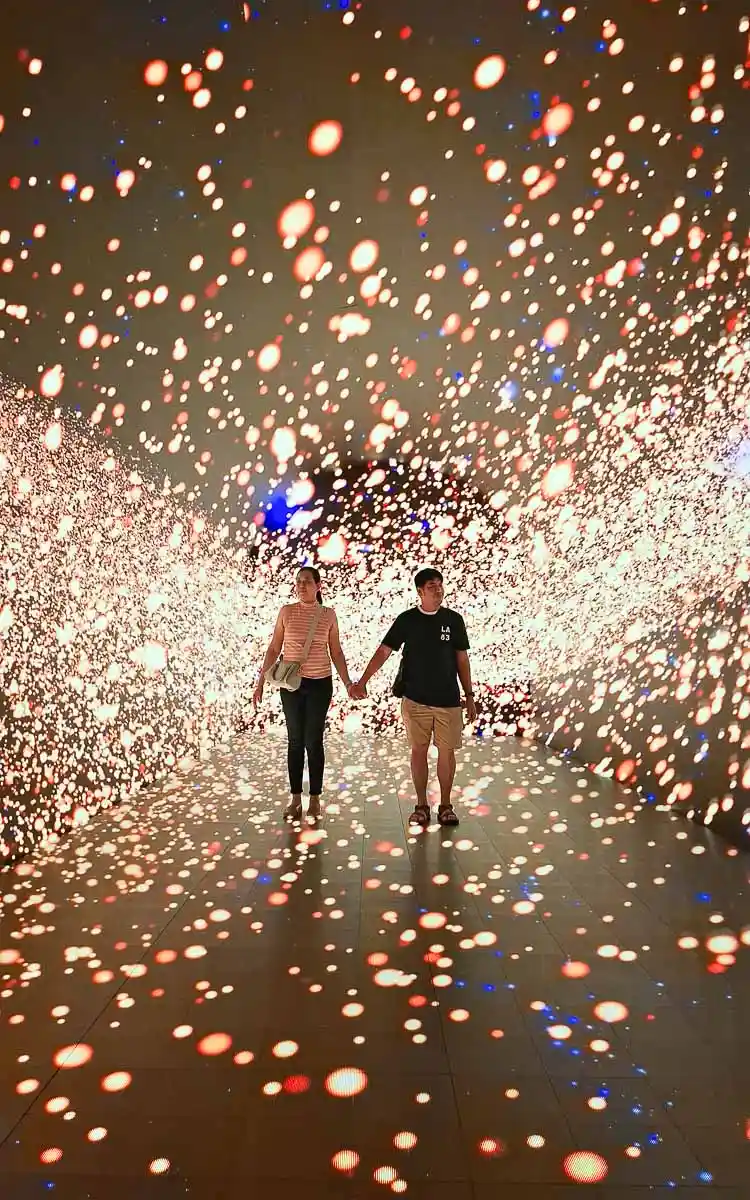
1. Time-Space Tunnel
The signature experience: a 10-meter LED tunnel with synchronized strobe lights creating the illusion of infinite depth. It’s disorienting in the best way. Use burst mode on your phone camera to capture the light patterns mid-sequence. Warning: People with epilepsy should skip this due to rapid flashing.
2. Wandering Planet
An infinity mirror room with suspended glowing orbs that create the sensation of floating in space. This is everyone’s favorite—expect to wait 5-10 minutes during busy periods. Wide-angle shots work best here.
3. Rail Cinema
Interactive projection where your shadow becomes part of a moving cityscape. Kids love this, and it’s great for playful group shots. Less “Instagram aesthetic,” more “fun family photo.”
4. Starry Ocean
Floor-to-ceiling LED panels simulating an underwater bioluminescent scene. The color transitions are soothing, and it photographs beautifully in portrait orientation for phone wallpapers.
5. Tyndall Effect
Named after the scientific phenomenon of light scattering, this room uses laser beams and fog machines to create visible light rays you can “touch.” Wear dark clothing for the best contrast.
6. Kaleidoscope
Mirrored hexagonal chambers that fracture your reflection into repeating geometric patterns. Claustrophobic folks might skip this—the chambers are small.
Exclusive SM North Installations:
7. Breathing Lights
Motion-reactive LED panels that pulse and change color based on your movement. I spent 10 minutes playing with this, waving my arms like a conductor to create light symphonies. Underrated installation that most people rush through.
8. Dancing Particles
Floor projection where digital particles scatter and regroup around your footsteps. Another motion-reactive installation that’s more playful than photogenic.
9. Love Scenario
A couples-focused photo booth with heart-shaped LED frames and romantic backdrops. Cheesy? Absolutely. Will couples still take 50 photos here? Also absolutely.
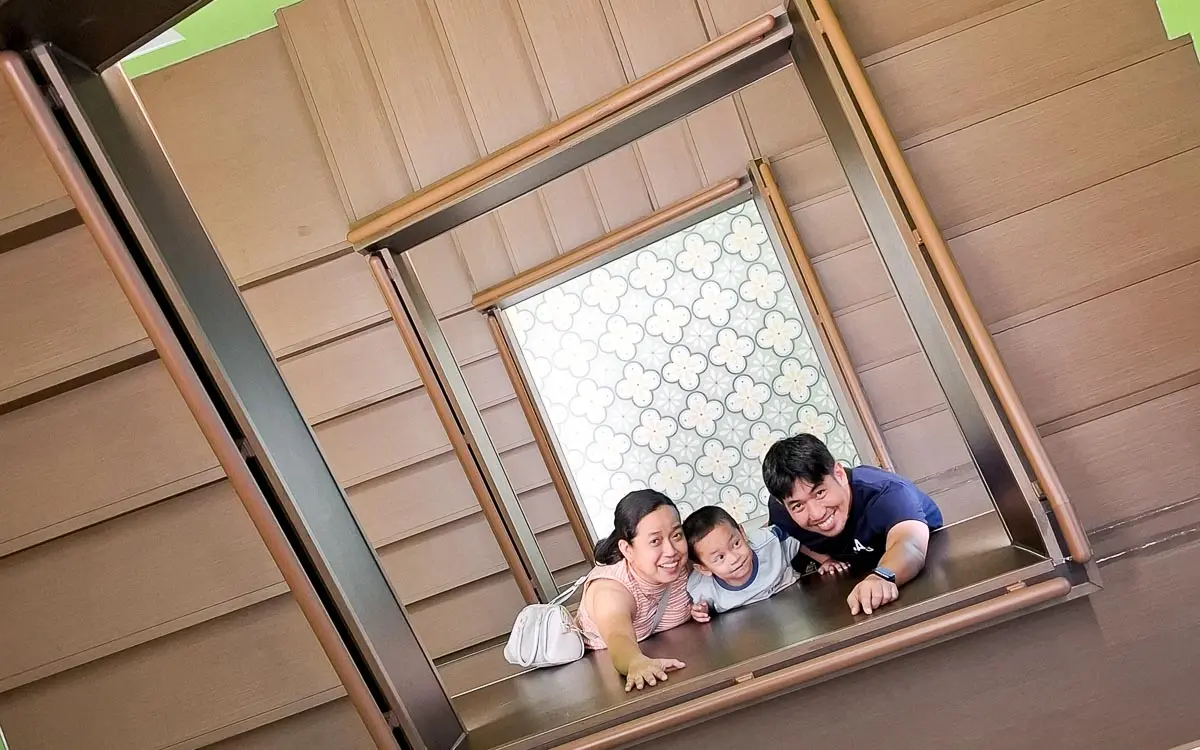
10. The Nest
A cozy dome structure with interior LED constellations. It’s designed for small groups (2-4 people) to sit inside for immersive viewing. Good for a breather between more active installations.
Room-by-Room Experience Guide
Recommended Route (based on my experience):
- Start with Time-Space Tunnel – Get the marquee experience first while crowds are lightest
- Hit the exclusive installations (Breathing Lights, Dancing Particles) – These are less crowded because they’re newer and less promoted
- Midpoint break at The Nest – Rest your eyes from LED overload
- Tyndall Effect + Kaleidoscope – Quick photo ops in smaller spaces
- Save Wandering Planet for last – It’s the most photogenic, so save it for when you’ve warmed up your photography skills
Time Estimates Per Installation:
- Quick pass (basic photos): 2-3 minutes each
- Thorough exploration: 5-8 minutes each
- Photography enthusiast mode: 10-15 minutes each
Most installations have subtle sound design (ambient music, nature sounds) that enhances immersion if you remove your earbuds. The overall sensory experience is better when you’re not rushing.
Duration & Flow
Minimum visit: 45 minutes (speed-run all installations with basic photos)
Recommended: 1-1.5 hours (enjoy at a relaxed pace with good photo opportunities)
Photography enthusiasts: 2+ hours (wait for clear shots, experiment with angles)
There’s no time limit once you enter, which is refreshing. I’ve been to museums that rush you through in exactly 60 minutes. Here, you can loop back to your favorite installations or camp out in Wandering Planet until you nail that shot.
The layout flows in a roughly circular path, though you can backtrack freely. Staff are present but unobtrusive—they’ll help with photos if you ask (and they’re genuinely good at framing shots).
Recommended Itinerary & Tips
The Perfect 90-Minute Visit
10:00 AM – Arrival
Arrive right when the museum opens to beat crowds. Klook ticket holders skip the counter and go straight to the entrance. Store bags in the free lockers provided.
10:05 AM – Time-Space Tunnel
Hit this first while your eyes are fresh and the tunnel is empty. Take a video walking through slowly, then a few static shots. The morning light filtering through creates slightly different effects than afternoon visits.
10:15 AM – Exclusive Installations Tour
Breathing Lights → Dancing Particles → Love Scenario. These are the hidden gems most visitors rush through. Spend time with the motion-reactive features—they’re more fun than they photograph.
10:35 AM – Rest Break at The Nest
Sit inside for 5 minutes. Check your photos so far. Delete the blurry ones. Let your eyes adjust—constant LED exposure is fatiguing.
10:40 AM – Quick Photo Circuit
Rail Cinema → Starry Ocean → Tyndall Effect → Kaleidoscope. Move efficiently but not frantically. These installations are straightforward photo ops.
11:00 AM – Wandering Planet (Grand Finale)
By now, you’ve practiced your phone photography skills. Apply everything to the mirror room. Take both portrait and landscape shots. Try reflection compositions. This is where you’ll get your best content.
11:20 AM – Second Loop (Optional)
If you have energy, do a quick second pass through your top 3 installations. First-run photos are rarely your best—you’ll have ideas for improvements.
11:30 AM – Exit & Debrief
Total time: 90 minutes. You’ve seen everything, captured quality content, and didn’t feel rushed.
What to Bring (and Not Bring)
Essential Items:
- Fully charged phone (you’ll shoot 100+ photos/videos easily)
- Portable charger (LED installations drain batteries fast with screen brightness maxed)
- Comfortable shoes (you’ll be standing and walking for 1-2 hours)
- Light, photogenic clothing (solid colors work better than busy patterns; whites and pastels pop against LED backgrounds)
Optional but Useful:
- Phone tripod (small tabletop ones are allowed; full-size tripods may be restricted during peak hours)
- Wide-angle lens attachment (for phones—helps in smaller rooms like Kaleidoscope)
- Tissues (for cleaning phone camera lens between shots)
Leave at Home/Locker:
- Large bags or backpacks (free lockers provided, but why carry them at all?)
- Food and drinks (prohibited inside; water fountains not available)
- Professional DSLR with external flash (allowed but flash use is prohibited)
- High expectations (it’s fun, not life-changing)
Pro Photography Tips
After taking 200+ photos during my visit, here’s what worked:
Phone Settings:
- Disable HDR for LED installations (it creates weird halos and blown-out highlights)
- Lock exposure on your subject before shooting (tap and hold on iPhone; similar on Android)
- Use Night Mode sparingly (great in Tyndall Effect; terrible in bright LED rooms)
- Shoot in burst mode in the Time-Space Tunnel to capture perfect light sync
- Portrait mode fails in mirrors—use standard photo mode in Wandering Planet
Angles and Composition:
- Get low in the Time-Space Tunnel (camera near floor, shoot upward)
- Center yourself in Kaleidoscope for perfect symmetry
- Use reflections creatively in Wandering Planet (include your reflection as a compositional element)
- Capture shadows in Tyndall Effect (silhouettes with laser beams)
- Shoot vertical for Instagram Stories, horizontal for feed posts
Avoiding Common Mistakes:
- Don’t use flash (it’s prohibited and ruins photos anyway)
- Don’t block pathways for “the perfect shot” when crowds are present
- Don’t touch the installations (oils from hands damage LED panels)
- Don’t zoom digitally (move closer instead—digital zoom destroys quality)
The best photos come from experimenting for 5-10 minutes per installation rather than snapping one shot and moving on. Watch how the lights cycle through patterns. Learn the timing. Then shoot.
Space & Time Cube SM North vs S’Maison: Which Is Better?
If you’re deciding between the two branches, here’s the breakdown:
Key Differences
Size:
- S’Maison (Pasay): Larger footprint, more spacious rooms
- SM North: Slightly more compact but identical core experience
Exclusive Attractions:
- S’Maison: Rolling Sphere, Crystal Tunnel
- SM North: Breathing Lights, Dancing Particles, Love Scenario, The Nest
Crowd Levels:
- S’Maison: Consistently busier (MOA area draws more tourists)
- SM North: Quieter on weekdays, comparable on weekends
Accessibility:
- S’Maison: Better for South Metro residents, tourists staying near MOA
- SM North: Better for North Metro, Quezon City, Bulacan residents
Overall Experience: 95% similar. The core installations (Time-Space Tunnel, Wandering Planet) are identical. The exclusive attractions at each branch are nice-to-haves, not must-sees.
Our Verdict
Visit SM North if:
- You live north of Makati (saves 1-2 hours commute time)
- You prefer smaller crowds (weekday mornings especially)
- You want to combine the visit with SM North shopping/dining
- You’ve never been to either branch (it’s the fresher option)
Visit S’Maison if:
- You’re already near MOA/Pasay for other reasons
- You prefer slightly more spacious installations
- You’re a completist who wants the original branch experience
- You’re combining it with sunset at Manila Bay
Visit both if:
- You’re a digital art enthusiast who wants to compare
- You’re creating content and want maximum variety
- You have time and budget for both (I don’t recommend this for most people—the experiences are too similar)
I’ve only visited SM North (January 2026), but based on friends who’ve been to both: if you can only choose one, SM North wins on convenience for most Metro Manila residents. If money and time aren’t constraints, S’Maison offers a marginally more polished experience.
For most visitors, the branch choice should be purely logistical: which is easier to reach from your location?
Important Rules & Visitor Policies
What’s Allowed
Photography and Videography:
Personal photos and videos are encouraged. Phone cameras, DSLRs, mirrorless cameras, and compact cameras are all permitted. Staff will even offer to take photos for you if you ask politely.
Time Inside:
No time limit. You can stay as long as you want during operating hours (typically 10 AM-9 PM daily). I saw people who’d clearly been inside for 2+ hours, looping back through favorite installations.
Re-entry:
Not allowed. Once you exit, your ticket is void. Plan accordingly—if you need a meal break, finish your visit first.
What’s Not Allowed
Outside Food and Beverages:
Strictly prohibited. Free lockers are provided at the entrance for storing shopping bags, food items, and bulky personal items. You can’t bring in water bottles or snacks.
Flash Photography:
Flash ruins the LED lighting effects and bothers other visitors. Staff will politely remind you if they see flash going off. Modern phones don’t need flash here anyway—the installations are bright enough.
Touching Installations:
Look, don’t touch. Oils from hands damage the LED panels and mirror surfaces. Motion-reactive installations like Breathing Lights and Dancing Particles don’t require physical contact—they respond to movement in proximity.
Professional Shoots Without Permission:
If you’re planning a commercial shoot (fashion, product photography, influencer brand deals), contact management in advance. Personal content creation is fine; commercial requires clearance and potentially a fee.
Accessibility Features
Wheelchair Access:
Fully accessible. SM North has elevators from ground floor to The Block 5th floor. The museum entrance has no steps, and all installations are on a single level with wide pathways suitable for wheelchairs and strollers.
Navigation Assistance:
Some rooms (Kaleidoscope, Tyndall Effect) have low lighting and may require sighted assistance for visually impaired visitors. Staff are available to help guide visitors through the experience.
Sensory Considerations:
Important: The Time-Space Tunnel uses rapid strobe effects that may trigger photosensitive epilepsy or migraine headaches. There’s a warning sign at the entrance—skip this installation if you’re sensitive to flashing lights. The rest of the museum uses gentler lighting transitions.
Parents with young children (under 5): some kids find the darkness and intense visual stimuli overwhelming. The museum is stroller-accessible, but the experience works better when children can walk and engage independently.
Where to Eat & What to Do After
Dining at The Block
Space & Time Cube deposits you on the 5th floor of The Block, which is packed with dining options:
Quick Bites (₱150-300/person):
- Food Hall: Multiple stalls with Filipino, Japanese, Korean, and Western options
- Jollibee: For the classic Filipino fast food experience
- Mang Inasal: Unlimited rice with grilled chicken
Sit-Down Restaurants (₱300-500/person):
- Yabu: Katsu specialist with solid tonkatsu sets
- Din Tai Fung: Taiwanese xiaolongbao and noodles
- Pepper Lunch: DIY sizzling plates
- Ramen Nagi: If you’re craving ramen after your museum visit
My post-museum meal was at the Food Hall (Korean fried chicken + milk tea for ₱285). It’s hard to go wrong with the variety available.
Other SM North EDSA Attractions
Turn your museum visit into a full day:
For Kids:
- Timezone: Arcade games and rides
- Ekart Raceway: Indoor go-karting (separately ticketed)
- Sky Garden: Outdoor space with playground areas
For Everyone:
- Cinemas: Multiple theaters if you want to catch a movie
- Shopping: Obviously—it’s one of Metro Manila’s largest malls
- Skate Park: If you or your kids are into skating
Nearby (Beyond SM North):
- Quezon Memorial Circle (15-minute drive): Historic park with museum and bike rentals
- For history buffs interested in exploring beyond modern attractions, consider visiting historic sites like Intramuros or taking day trips to Corregidor Island
If you’re chasing unique cultural experiences like visiting Buscalan for traditional tattoos, Space & Time Cube represents the opposite end of the Filipino experience spectrum—ultra-modern, digitally-native, Instagram-optimized. Both are valid; just know what you’re getting.
Space & Time Cube SM North EDSA FAQs (2026)
Is Space & Time Cube SM North EDSA worth visiting in 2026?
Yes—Space & Time Cube SM North EDSA is worth visiting in 2026 if you go during off-peak hours and use discounts. Weekday mornings offer fewer crowds and better photo opportunities, making the ₱748 discounted ticket price good value for an immersive, air-conditioned experience in Quezon City.
What is the best time to visit Space & Time Cube SM North EDSA?
The best time to visit Space & Time Cube SM North EDSA is on weekdays between 10:00 AM and 12:00 PM. Avoid weekends from 2:00 PM to 6:00 PM when crowds peak and photo quality drops.
What is the Space & Time Cube SM North EDSA ticket price in 2026?
The Space & Time Cube SM North EDSA ticket price for 2026 is ₱880 for adults and ₱680 for children. Booking online through Klook typically offers discounts of up to 15%.
Final Verdict: Should You Visit Space & Time Cube?
After spending 90 minutes inside on a January 2026 Thursday morning, here’s my honest take:
Space & Time Cube SM North EDSA delivers on its core promise: an Instagram-worthy, air-conditioned, accessible digital art experience. It’s not revolutionary if you’ve traveled extensively and visited top-tier immersive museums abroad, but it’s genuinely fun, well-executed, and convenient for Metro Manila residents.
Our Honest Recommendation
Visit if you:
- Live in North Metro Manila or Quezon City (convenience factor is huge)
- Enjoy photography and want fresh content for social media
- Are planning a unique date or group outing
- Haven’t experienced immersive digital art museums before
- Can visit during weekday mornings for the best crowd-free experience
- Found a discount code bringing the price to ₱750 or below
Skip if you:
- Are on a tight budget and prioritizing experiences over Instagram moments
- Recently visited teamLab, ARTECHOUSE, or similar high-end installations
- Expect educational museum content rather than entertainment
- Are bringing toddlers under 5 (they won’t remember it and might find it overwhelming)
- Only have weekend afternoon availability and hate crowds
My personal assessment: At ₱748 with Klook discount on a quiet Thursday at 10:30 AM, this was absolutely worth the money. I left with 150+ quality photos, genuinely enjoyed the Time-Space Tunnel and Wandering Planet, and appreciated the convenient SM North location (I was done by noon and grabbed lunch right outside).
Would I pay ₱880 walk-in on a packed Saturday afternoon? Probably not. The experience quality drops significantly when you’re waiting in line for each installation and strangers are constantly in your shots.
Value Sweet Spot
The ideal scenario: Weekday morning (10-11 AM arrival) + Klook discount (₱748) + good weather for easy transport = excellent value
That combination delivers the museum at its best: empty rooms, perfect lighting, time to experiment with photography, and a price point that feels fair for an hour of entertainment.
If you can hit that sweet spot, don’t hesitate. Book your tickets, charge your phone, and prepare for a surprisingly fun hour in a galaxy of LED lights.
Disclosure: This post may contain affiliate links. If you click through and make a purchase, we may earn a small commission at no extra cost to you. Thank you for your support!
Space & Time Cube at SM Mall of Asia (MOA)
The MOA branch of Space & Time Cube sits on the 3rd floor of SM Mall of Asia in Pasay, bringing the same LED-lit infinity rooms and motion-reactive installations to the Manila bayside mall. If you’re already heading to MOA for the ocean breeze, the strip mall vibe, or a concert at the arena, adding Space & Time Cube turns a half-day into a full afternoon without much extra travel.
The MOA space is slightly smaller than the SM North branch. That means fewer rooms and a faster loop, which can actually work in your favor if you’re short on time. The installations themselves — the Time-Space Tunnel, Wandering Planet, and the mirrored infinity rooms — are the same core concept. What changes is the crowd pattern: MOA pulls more tourists and weekend families, while SM North skews toward Quezon City locals and weekday office workers.
MOA-specific tips
- Entrance: Take the elevator to Level 3; Space & Time Cube is near the center atrium, past the major fashion brands.
- Best arrival time: Weekday afternoons (2–4 PM) and early mornings (opens at 10 AM) are quietest.
- Combine with: MOA’s Seaside Market, the bay walk, and a sunset at the esplanade make a natural afternoon plan.
- Online booking: Klook and Shopee vouchers work for both branches — book ahead to skip the walk-in queue during peak hours.
SM North vs MOA — Which Should You Visit?
If you have time for only one branch, the choice depends on where you’re staying and what else is on your itinerary. Here is a side-by-side breakdown to help you decide:
| Factor | SM North EDSA (Quezon City) | SM Mall of Asia (Pasay) |
|---|---|---|
| Crowd level | Weekdays: light. Weekends: moderate. Best on weekday mornings. | Weekdays: light. Weekends and holidays: heavy — mall + tourist traffic combined. |
| Size / installations | Larger space; 18+ rooms; more time to explore each installation. | Compact; fewer rooms; faster flow through the experience. |
| Transport access | MRT North Avenue / bus routes along EDSA. Convenient from Metro Manila north and central areas. | LRT MOA / bus along Roxas Blvd. Best if you’re staying in Manila Bay, Pasay, or Makati. |
| Parking | The Block car park; weekday mornings have plenty of space. | MOA North/South car parks; weekend arrival before 11 AM recommended. |
| Nearby food | The Block concourse, Trinoma, SM North Cinema food strip. | MOA food court, S Maison, seaside restaurants. |
| Best for | Photographers who want empty rooms; office workers on a weekday lunch break; families in QC. | Tourists staying in Pasay/MOA area; shoppers combining with mall time; sunset plans after the visit. |
| Ticket price (2026) | PHP 880 adult / PHP 680 child; Klook ~PHP 748 | PHP 880 adult / PHP 680 child; Klook ~PHP 748 |
The short version
Choose SM North EDSA if you want the bigger, roomier experience and can visit on a weekday morning. Choose MOA if you’re already at the mall, staying in Pasay, or want to pair it with a waterfront afternoon. Both branches share the same core installations and pricing — the differences are crowd patterns, size, and convenience.
Quick Answers
Is Space & Time Cube worth it in 2026? Yes — if you visit on a weekday morning and use a Klook or Shopee discount. Full-price walk-in on a packed weekend is harder to justify for a 45–90 minute experience. The sweet spot is real: weekday 10–11 AM arrival + discounted ticket = excellent value.
Is it suitable for kids? The PHP 680 child ticket makes it accessible for families, but note that some rooms have dark, enclosed spaces and flashing lights. Check your child’s comfort with enclosed dark spaces before booking.
How long should I stay? Most people finish in 45 minutes to 1.5 hours. If you’re there on a quiet weekday, you can stretch it to 2 hours without pressure.
Can I visit both branches? Yes, but you only need one visit unless you’re a content creator who wants footage from two locations. Back-to-back visits in the same day are tiring — split them across two days if you want both.
More Metro Manila guides: Intramuros Manila | Corregidor Island | Mount Daraitan Day Hike
Leave a Reply